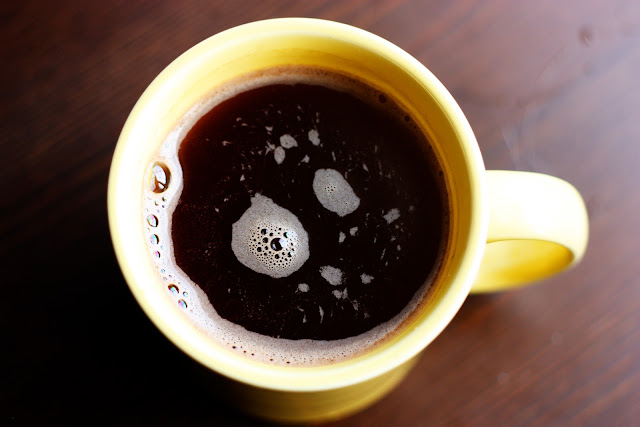
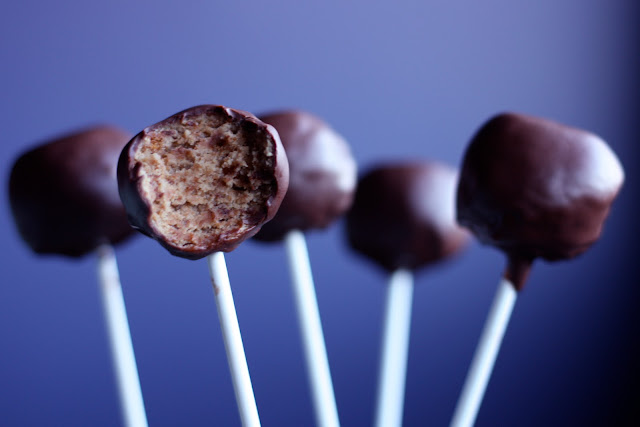
My point is this: you can take great photos with any camera.
Last year, I wrote a post for my friend's blog sharing some basic tips on how to improve your food photography. These photo tips can be used with any camera- even the one on your phone. I thought it would be fun to share that post here [below] to give a little insight to what happens in my kitchen and answer some of your questions.
Read on, and happy shooting : )
------------------------------
Food is a multi-sensory experience. When a dish is set before you in person, you can see, taste, smell, feel, and sometimes even hear how delicious it is. Food Photography can be difficult, because the only sense you have to work with is sight. The picture has to invite the viewer into the dish and show them how delicious it is. When done right, Food Photography can make stomachs growl, mouths water, and occasionally induce a viewer to lick their computer screen!
When I first started snapping food photos (long before I started my blog), they were completely unappetizing. And I couldn't understand why! It was frustrating to not be able to translate what I knew was a delicious dish into an appealing photograph. First I blamed my camera... then I blamed the lights in my kitchen... and my lack of a decent photo editing program. But really, I just didn't know what I was doing!
With a little online research, a lot of experimentation, and a few moments of dumb luck, I finally "figured it out". That's not to say I'm an expert now, I just understand what makes a food photo appetizing and the basics of how to achieve those criteria. When Kim asked me to do a guest post on Food Photography, I tried to look back and think of what I wish someone would have told me from the start. Below you will find 5 basic tips that can make a HUGE impact on your photography. I say basic because anyone can implement them, regardless of experience or type of camera.
So grab a cup of coffee, your 5D Mark II, your D40, your point-and-shoot, or your iPhone, and get ready to make people hungry!

1. Use natural light.
If you are only going to pay attention to one thing I say here, please let it be this: use natural light. Food just looks better in natural light, no matter how much fancy editing you can do. The way that artificial light falls on food can sometimes make it look flat [not to mention the nasty yellow tinge]. Natural light brings out more delicious detail, especially when it falls from the side of a subject. My kitchen [unfortunately] has no windows and only one giant, hideous fluorescent light. Solution: I don't photograph in my kitchen. I shoot in my living room, next to the window. It's inconvenient, but the results are worth the trouble. Try an experiment the next time you are cooking or baking: take a picture in your kitchen, then move the dish next to a window take the same picture. Then you tell ME what looks more appetizing!

2. If you can't use natural light... turn off your flash, and fix your white balance.
OK, let's be realistic. Unless you do some planning ahead, you may not have any natural light to work with. You may be in a restaurant, or eating dinner after dark. Shooting in artificial light is not ideal, but there are things you can do to make your photos better. First, turn off your flash. I know, flash means more light. But using flash on food can make your shots look like they belong in a greasy diner menu. So please, turn it off! If you find your photos are blurry because of low light and shaky hands, try using a tripod [or stack of books, bag of rice, etc].
Second: if you are shooting in artificial light, fix your white balance. Artificial lighting can be very yellow. Your eyes naturally compensate for it, but you have to tell your camera how to. Take a shot and review it. What you saw through your lens and what appeared on your screen are likely very different things. Change the white balance to the appropriate light source, or set it to evaluative if that's an option. You might have to check your camera manual to figure out how to change the settings, or play around with different treatments/filter on your camera phone. An easy way to figure out the "right" setting is to photograph something white [like a plate or napkin] and play around until it actually looks white.

[The above shot was taken at night, in my kitchen with the terrible Fluorescent lights, with my point and shoot!]
3. Get up close and personal.
Food is meant to be eaten. Which [usually] means we get to inspect it closely before taking a bite. Filling your frame with the subject makes you feel like you are "in" the dish. You want to see each individual sprinkle, the grains of salt, the crumbs, every mouth-watering detail. Having a realistic in-your-face view helps the viewer imagine actually sinking their teeth in.
Getting closer can also help you make the food look more appetizing. By focusing on one bite in the foreground, you can draw attention to the most perfect looking piece and blur out the rest. If you have a DSLR, open up your aperture. [Not only will this let in more light, but it will give you some dreamy-delicious bokeh.] Most point and shoot cameras have a macro mode, which can achieve similar effects. On a camera phone, use perspective as your tool. Place the most attractive bite in the foreground, leaving others behind. Not every cookie or cupcake is going to be perfect, but you can always find one [or a side of one] and fake it.

4. Simple works best.
You want people to pay attention to what's on the plate, not what's going on around it. I like to use colored cardstock placed under/behind my subject [to block out my living room], or to shoot down on a wooden cutting board [or end table]. Patterned place mats or even wrapping paper can give you an interesting background, just be careful not to overwhelm your food. Use discretion when choosing dishes as well. Some foods look appetizing when showcased on beautiful patterned china, but a simple white plate really lets the food speak for itself.
Keep simplicity in mind when you are composing your photo too. A heaping plate full of several dishes can look delicious, but sometimes it makes for a busy photo. Think about what you want your viewer to focus on, and give it a prominent, obvious place in the frame.

5. Play with your food!
Pose your subject for the photo. You would fix your hair and put on makeup before having your photo taken, wouldn't you? Give the food the same treatment. Don't just throw it on a plate... stack it up, angle it, garnish it, treat it like a model. Take the shot you had envisioned, then try a new angle. Look down from above, or get down and shoot from the side. Don't be afraid to try something new or different. The more photos you take, the more likely you are to capture that perfect shot!

And that's it! Five basic tips that you can use with any camera to improve your food photography. I hope this post encourages you to start sharing some delicious dishes, and to have FUN while you're clicking. I'm sure your friends will all be licking their screens in no time!
Oh! And one "bonus tip" for when you're shooting food photos... eat the props when you're done!
Hiç yorum yok:
Yorum Gönder